Lab 1: Create Azure resources
Task 1: Open the Azure portal
On the taskbar, select the Microsoft Edge icon.
In the open browser window, browse to the Azure portal (https://portal.azure.com), and then sign in with the account you'll be using for this lab.
Note: If this is your first time signing in to the Azure portal, you'll be offered a tour of the portal. Select Get Started to skip the tour and begin using the portal.
Task 2: Open Azure Cloud Shell
In the Azure portal, select the Cloud Shell icon
 to open a new Bash session. If Cloud Shell defaults to a PowerShell session, select PowerShell and, in the drop-down menu, select Bash.
Note: If this is the first time you are starting Cloud Shell, when prompted to select either Bash or PowerShell, select Bash. When you are presented with the You have no storage mounted message, select the subscription you are using in this lab, and then select Create storage.
In Azure portal, at the Cloud Shell command prompt, run the following command to get the version of the Azure Command-Line Interface (Azure CLI) tool:
az --version
Task 3: Review the Microsoft.EventGrid provider registration
In the Cloud Shell pane, run the following command to check if the resource provider "Microsoft.EventGrid" has been registered :
az provider show --namespace Microsoft.EventGrid --query "registrationState"Notice that the Microsoft.EventGrid provider has been registered.
Close the Cloud Shell pane.
Task 4: Create a custom Event Grid topic
On the Azure portal's navigation pane, select Create a resource.
On the Create a resource blade, in the Search services and marketplace text box, enter Event Grid Topic, and then select Enter.
On the Marketplace search results blade, select the Event Grid Topic result, and then select Create.
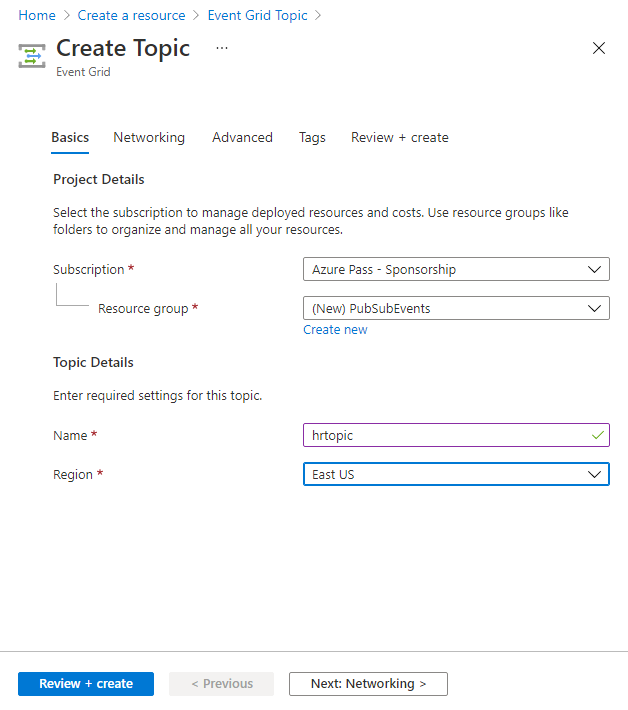
On the Create Topic blade, on the Basics tab, perform the following actions, and then select the Advanced tab:
| Setting | Action | | -- | -- | | Subscription drop-down list | Retain the default value | | Resource group drop-down list | Select Create new, enter PubSubEvents, and then select OK | | Name text box | Enter hrtopic[yourname] | | Region drop-down list | Select East US |
The following screenshot displays the configured settings on the Basics tab.
On the Advanced tab, from the Event Schema drop-down list, select Event Grid Schema, and then select Review + create.
On the Review + create tab, review the options that you selected during the previous steps.
Select Create to create the event grid topic by using your specified configuration.
Note: Wait for Azure to finish creating the topic before you continue with the lab. You'll receive a notification when the topic is created.
Task 5: Deploy the Azure Event Grid viewer to a web app
On the Azure portal's navigation pane, select Create a resource.
On the Create a resource blade, in the Search services and marketplace text box, enter Web App, and then select Enter.
On the Marketplace search results blade, select the Web App result, and then select Create.
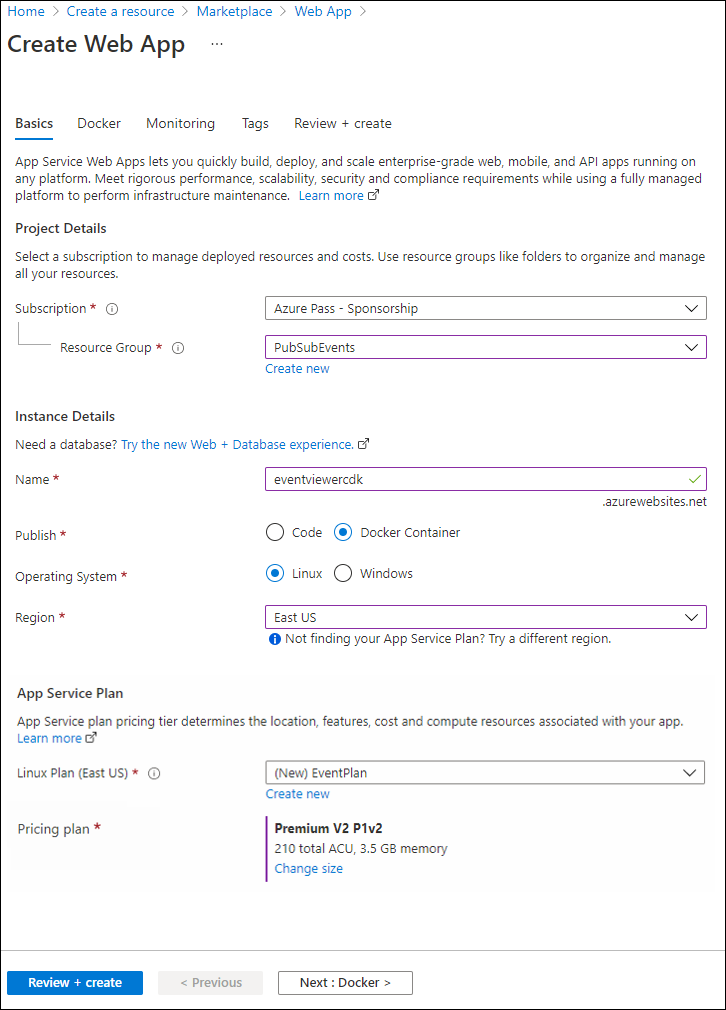
On the Create Web App blade, on the Basics tab, perform the following actions, and then select Next: Docker:
| Setting | Action | | -- | -- | | Subscription drop-down list | Retain the default value | | Resource group drop-down list | Select PubSubEvents in the list | | Name text box | Enter eventviewer[yourname] | | Publish section | Select Docker Container | | Operating System section | select Linux | | Region drop-down list | Select East US | | Linux Plan (East US) section | Select Create new, in the Name text box, enter EventPlan, and then select OK | | SKU and size** section | Retain the default value |
The following screenshot displays the configured settings on the Create Web App blade.
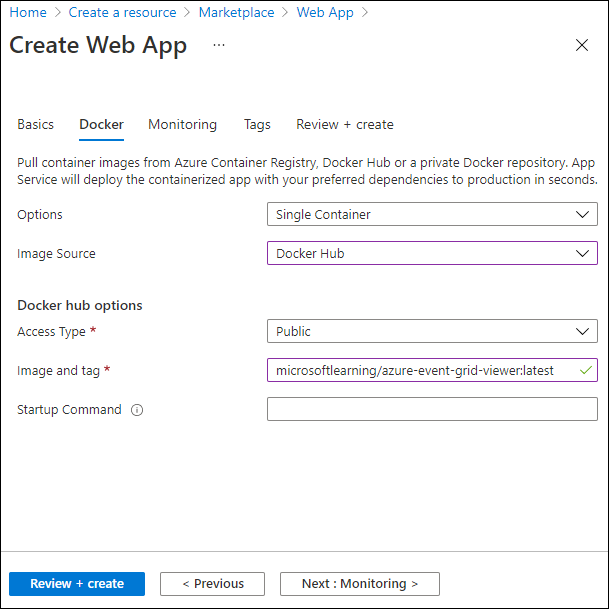
On the Docker tab, perform the following actions, and select Review + create:
| Setting | Action | | -- | -- | | Options drop-down list | Select Single Container | | Image Source drop-down list | Select Docker Hub | | Access Type drop-down list | Select Public | | Image and tag text box | Enter microsoftlearning/azure-event-grid-viewer:latest |
The following screenshot displays the configured settings on the Docker tab.
On the Review + create tab, review the options that you selected during the previous steps.
Select Create to create the web app using your specified configuration.
Note: Wait for Azure to finish creating the web app before you continue with the lab. You'll receive a notification when the app is created.
Review
In this exercise, you created the Event Grid topic and a web app that you will use throughout the remainder of the lab.