Lab 1: Configure a single-tenant Azure AD environment
Task 1: Open the Azure portal
On the taskbar, select the Microsoft Edge icon.
In the open browser window, browse to the Azure portal (portal.azure.com), and then sign in with the account you'll use for this lab.
Note: If this is your first time signing in to the Azure portal, you'll be offered a tour of the portal. Select Get Started to skip the tour and begin using the portal.
Task 2: Register an application in Azure AD
In the Azure portal, use the Search resources, services, and docs text box to search for Azure Active Directory and, in the list of results, select Azure Active Directory.
Note: This redirects your browser session to the blade of the Azure Active Directory (Azure AD) tenant associated with your Azure subscription.
On the Azure Active Directory blade, select App registrations in the Manage section.
In the App registrations section, select + New registration.
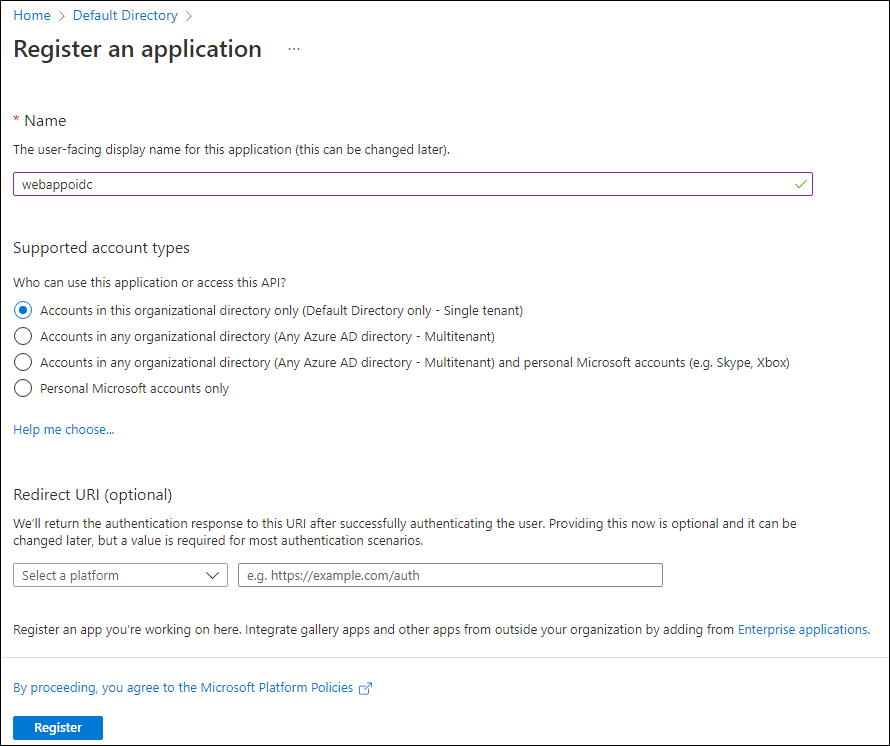
In the Register an application section, perform the following actions, and then select Register:
| Setting | Action | | -- | -- | | Name text box | Enter webappoidc | | Supported account types list | Select Accounts in this organizational directory only (Default Directory only - Single tenant) |
Note: The name of the tenant might differ depending on your Azure subscription.
The following screenshot displays the configured settings in the Register an application section.
Task 3: Record unique identifiers
On the webappoidc application registration blade, select Overview.
In the Overview section, find and record the value of the Application (client) ID text box. You'll use this value later in the lab.
In the Overview section, find and record the value of the Directory (tenant) ID text box. You'll use this value later in the lab.
Task 4: Configure the application authentication settings
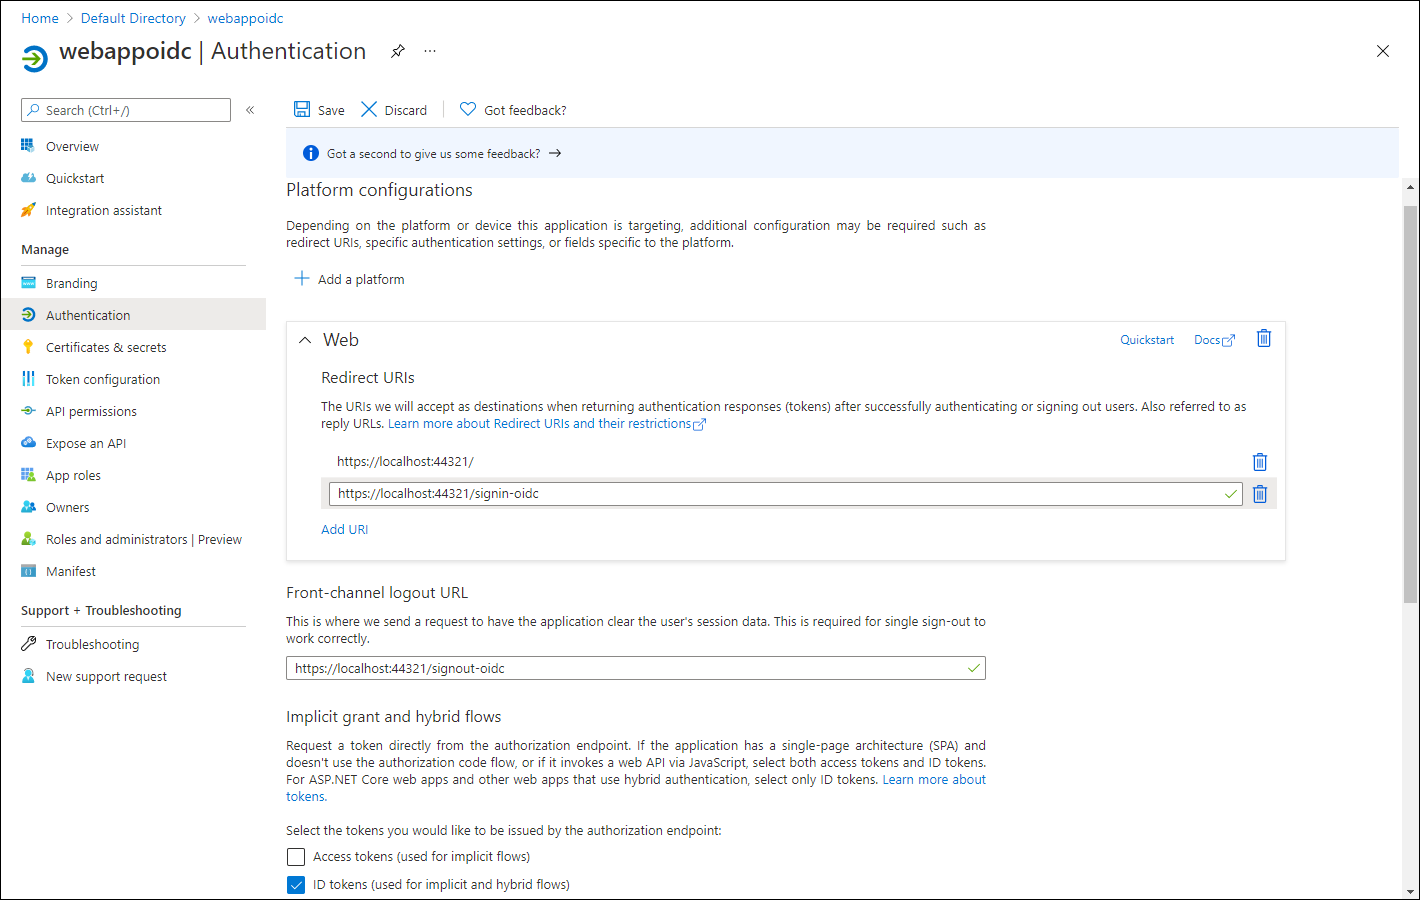
On the webappoidc application registration blade, select Authentication in the Manage section.
In the Authentication section, perform the following actions, and select Configure:
| Setting | Action | | -- | -- | | Platform configurations section | Select + Add a platform | | Configure platforms blade | Select Web | | Redirect URIs text box | Enter
https://localhost:5001/| | Front-channel logout URL text box | Enterhttps://localhost:5001/signout-oidc|Back in the Platform configurations section, select Add URI, and then enter
https://localhost:5001/signin-oidc.In the Implicit grant and hybrid flows section, select ID tokens (used for implicit and hybrid flows).
Select Save.
The following screenshot displays the configured settings on the Authentication blade.
Task 5: Create an Azure AD user
In the Azure portal, select the Cloud Shell icon
 to open a new PowerShell session. If Cloud Shell defaults to a Bash session, select Bash and then, in the drop down menu, select PowerShell.
Note: If this is the first time you're starting Cloud Shell, when prompted to select either Bash or PowerShell, select PowerShell. When the You have no storage mounted message appears, select the subscription you're using in this lab, and then select Create storage.
In the Cloud Shell pane, run the following command to sign in to the Azure AD tenant associated with your Azure subscription:
Connect-AzureADRun the following command to retrieve and display the primary Domain Name System (DNS) domain name of the Azure AD tenant:
$aadDomainName = ((Get-AzureAdTenantDetail).VerifiedDomains)[0].Name $aadDomainNameNote: Record the value of the DNS domain name. You'll use this value later in the lab.
Run the following commands to create Azure AD users that you'll use to test Azure AD authentication:
   $passwordProfile = New-Object -TypeName Microsoft.Open.AzureAD.Model.PasswordProfile
   $passwordProfile.Password = 'Pa55w.rd1234'
   $passwordProfile.ForceChangePasswordNextLogin = $false
   New-AzureADUser -AccountEnabled $true -DisplayName 'aad_lab_user1' -PasswordProfile $passwordProfile -MailNickName 'aad_lab_user1' -UserPrincipalName "aad_lab_user1@$aadDomainName"
Run the following command to identify the user principal name (UPN) of the newly created Azure AD user:
(Get-AzureADUser -Filter "MailNickName eq 'aad_lab_user1'").UserPrincipalNameNote: Record the UPN. You'll use this value later in the lab.
Close the Cloud Shell pane.
Review
In this exercise, you registered a single-tenant Azure AD application and created an Azure AD user account.